Jira manual tasks
Overview
Jira manual tasks enable Fides to automatically create Jira tickets when privacy requests are approved, track their progress, and complete the associated manual task when the Jira ticket is resolved. This allows your team to manage manual privacy request fulfillment directly in Jira, using your existing workflows and project boards, rather than through the Fides admin UI alone.
When a privacy request is approved, Fides creates a Jira ticket using a configurable template. A background polling process monitors the ticket's status in Jira. When the ticket is marked as done in Jira and a user has submitted the required data through Fides, the manual task is marked as complete and the privacy request can proceed.
Jira manual tasks are different from the Jira SaaS integration, which processes access and erasure requests against data stored within Jira itself. Jira manual tasks use Jira as a task management tool for coordinating manual work across your team.
Prerequisites
- Fides Cloud or Fides Enterprise
- A Jira Cloud instance (e.g.,
your-domain.atlassian.net) - A Jira user account with permissions to create issues in the target project
- If using OAuth 2.0:
- A Jira OAuth 2.0 (3LO) app (opens in a new tab) configured in the Atlassian Developer Console with:
- Scopes:
read:jira-work,write:jira-work,read:jira-user - Callback URL: matching your
FIDESPLUS__JIRA__REDIRECT_URI(e.g.,https://your-fides-instance.com/api/v1/plus/oauth/jira/callback)
- Scopes:
- The following environment variables:
FIDESPLUS__JIRA__CLIENT_ID— your Jira OAuth app client IDFIDESPLUS__JIRA__CLIENT_SECRET— your Jira OAuth app client secretFIDESPLUS__JIRA__REDIRECT_URI— the callback URL for the OAuth flow
- A Jira OAuth 2.0 (3LO) app (opens in a new tab) configured in the Atlassian Developer Console with:
- A configured manual task integration is recommended for understanding the broader manual task workflow
Authentication options
Fides supports two methods for authenticating with Jira:
| Method | Description | Recommended |
|---|---|---|
| OAuth 2.0 | Fides redirects you to Atlassian to authorize access. Tokens are managed and refreshed automatically. Tickets are created as the authorizing user, preserving the original user identity. | Yes |
| API key | Uses a Jira username and API token (opens in a new tab) for authentication via HTTP Basic Auth. Only available via the API setup method. | For environments where OAuth is not available |
Choose one of the following setup methods. Admin UI (recommended): configure the integration through the Fides Integrations page using OAuth 2.0. API: configure via REST API, which also supports API key authentication and is suited for automated or programmatic setups.
Setting up the integration (admin UI)
Step 1: Add the integration
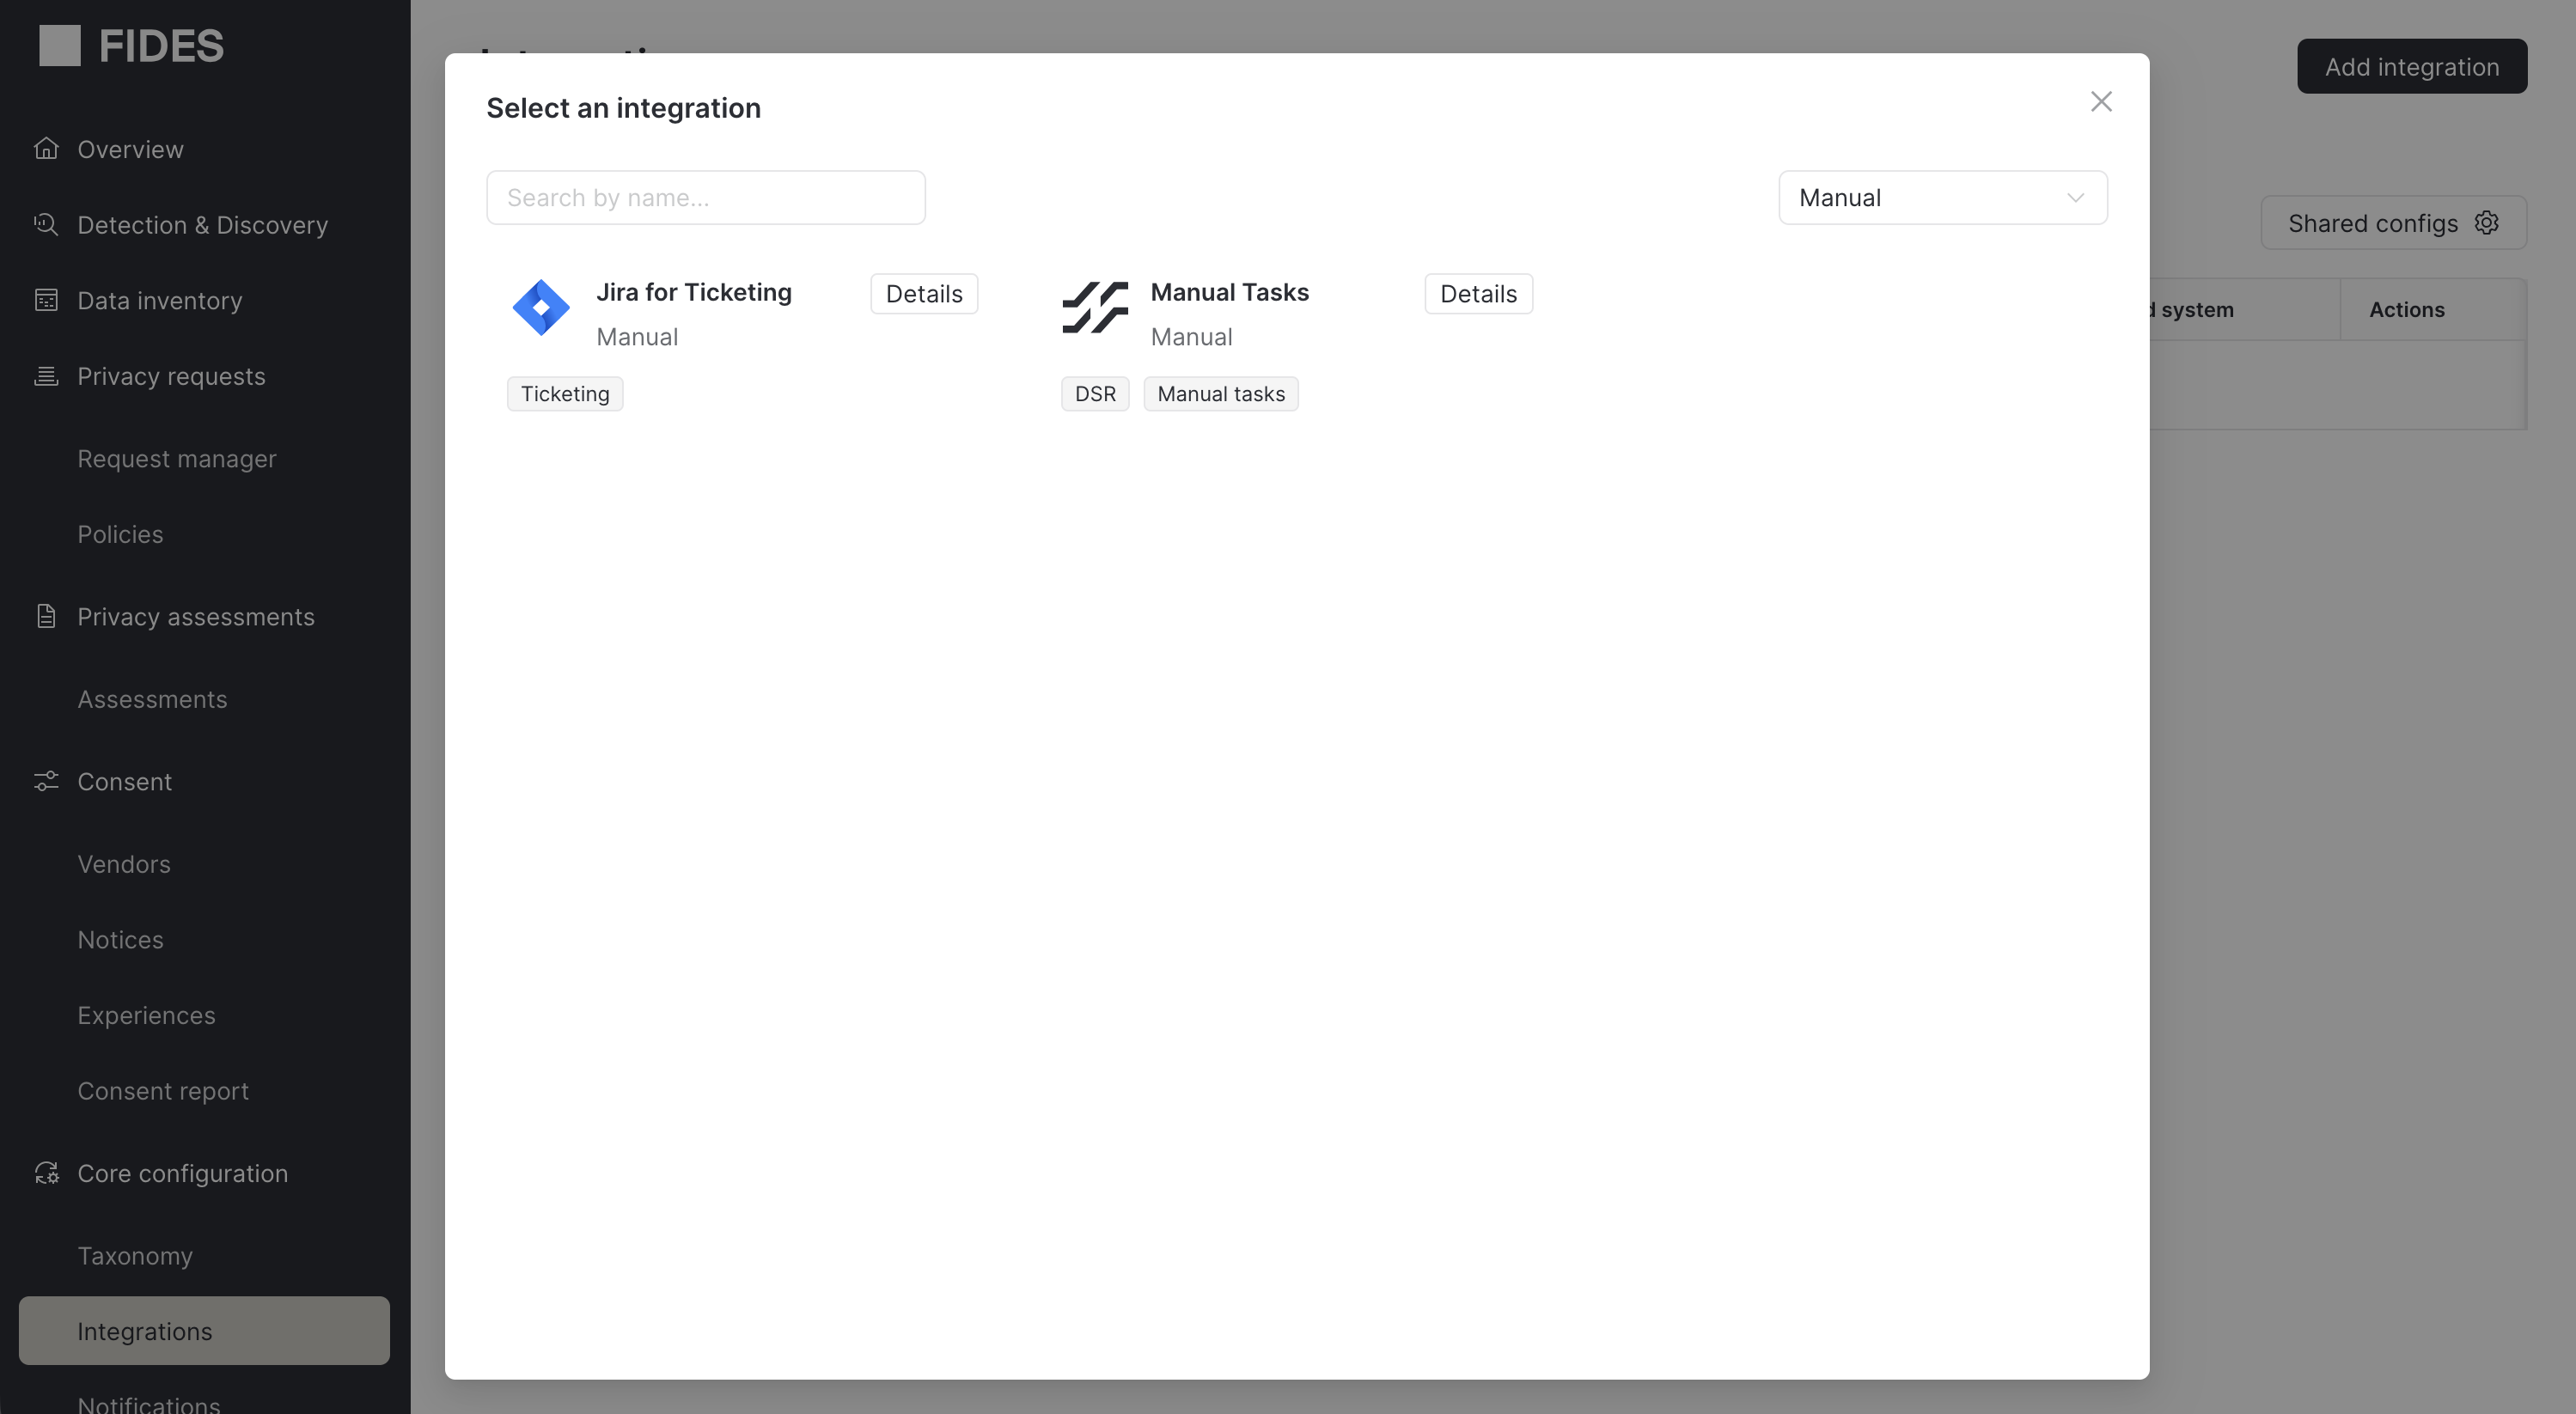
- Navigate to the Integrations page and click Add integration.
- Search for "Jira for Ticketing" or filter by the Manual category.
- Select Jira for Ticketing and click Next.
- Provide a name and description for the integration.
- Click Save to create the integration.
Step 2: Authorize with Jira
After creating the integration, the setup wizard displays two steps. The first step is to authorize Fides to connect to your Jira instance.
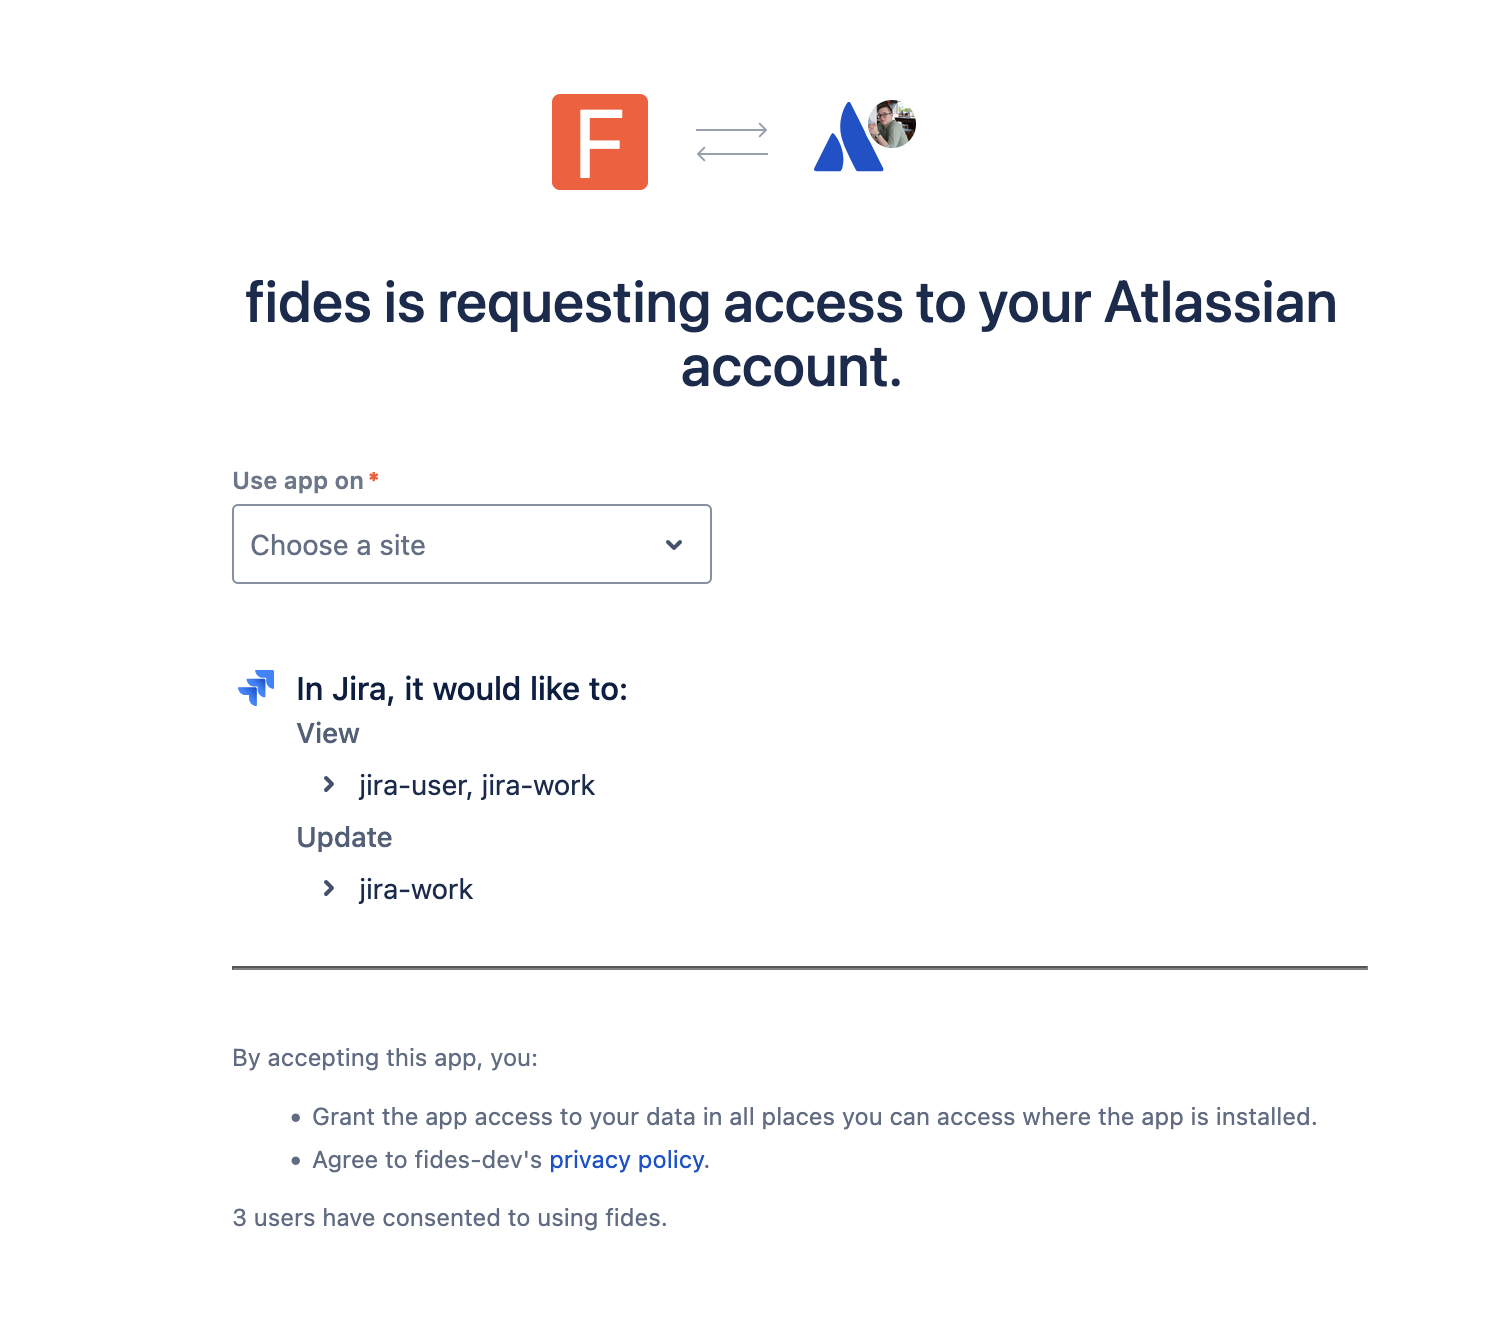
- Click the Authorize button on the integration detail page.
- You are redirected to Atlassian's authorization page where you grant Fides the following permissions:
- Read Jira work — view projects, issues, and statuses
- Write Jira work — create and update issues
- Read Jira users — view user information
- After granting access, you are redirected back to Fides with a confirmation message.
Fides manages OAuth tokens automatically, including refreshing tokens before they expire (tokens are refreshed 5 minutes before expiry).
Step 3: Configure ticket templates
Once authorized, the second setup step is to configure how Fides creates Jira tickets. Click on the Configure tickets tab to access the configuration form.
| Field | Description | Required |
|---|---|---|
| Project | The Jira project where tickets are created. Fides fetches available projects from your Jira instance. | Yes |
| Issue type | The type of issue to create (e.g., Task, Story). Subtask types are excluded. Available options depend on the selected project. | Yes |
| Summary template | A template for the ticket title. Supports template variables (see Template variables). | Yes |
| Description template | A template for the ticket body. Supports template variables. | No |
| Due date | A fixed number of days after approval to set as the Jira ticket's due date. Options: No due date, 7, 14, 30, 45, or 60 days. If left blank, the ticket's due date is set from the policy-derived deadline for the request. | No |
To insert template variables into the summary or description fields, type / or __ to open the variable picker. Select a variable to insert it in the format __VARIABLE_NAME__.
Example summary template:
DSR: __REQUEST_TYPE__ for __EMAIL__Example description template:
Privacy request __REQUEST_ID__ submitted on __SUBMISSION_DATE__.

Policy: __POLICY_NAME__
Fides link: __FIDES_REQUEST_URL__
Click Save configuration when you are done.

Step 4: Test the integration
After saving your configuration, you can create a test ticket to verify the integration is working end-to-end:
- From the integration detail page, click Create test ticket.
- Fides creates a real ticket in your Jira project using sample data for the template variables.
- Verify the ticket appears in your Jira project with the expected summary, description, and due date.
The test ticket is a real Jira issue. Delete it from your Jira project after verifying the integration works correctly.
How it works
Ticket creation
When a privacy request reaches the approved status, Fides automatically creates a Jira ticket for each enabled Jira ticketing integration. The ticket is created using the configured template, with template variables replaced by the actual values from the privacy request.
If ticket creation fails (e.g., due to a network error), Fides retries up to 3 times with exponential backoff. Authentication errors and rate limit errors are not retried.
Background polling
Fides runs a background task that polls Jira for ticket status updates at a configurable interval (default: every 10 minutes). During each polling cycle:
- Poll phase: Fides fetches the current status of all open Jira tickets in batch, grouped by connection. If a ticket is no longer found in Jira, it is marked as deleted.
- Evaluate phase: For tickets where the Jira status has changed to a terminal state (done or deleted), Fides evaluates whether the associated manual task can be completed.
Completion logic
A manual task is completed only when both conditions are met:
- The Jira ticket has reached a terminal status (done or deleted)
- A user has submitted the required data through Fides (via the manual task UI or API)
This two-condition design ensures that the Jira ticket serves as a tracking signal while the actual data submission happens through Fides.
| Jira ticket status | Data submitted in Fides | Result |
|---|---|---|
| Done | Yes | Task completed |
| Done | No | Waiting for data submission |
| Deleted | Yes | Task completed |
| Deleted | No | Task failed |
| Open | Either | No change (continue polling) |
Once all manual tasks (and automated integrations) for a privacy request are complete, the privacy request proceeds to the next step or is marked as fulfilled.
Managing Jira tickets
Viewing ticket status
Admin UI
The manual tasks section of the privacy request detail page shows all Jira tickets linked to the request, including the ticket key, current status, and a link to the ticket in Jira.
API
curl -X GET 'https://your-fides-instance.com/api/v1/plus/privacy-request/{privacy_request_id}/jira-tickets' \
  -H 'Authorization: Bearer <your_access_token>'
Returns a list of tickets with fields: ticket_id, ticket_key, ticket_url, status, status_category, created_at, and updated_at.
Refreshing ticket status on demand
While Fides polls Jira automatically, you can trigger an immediate status refresh for a specific ticket:
curl -X POST 'https://your-fides-instance.com/api/v1/plus/privacy-request/{privacy_request_id}/jira-tickets/{instance_id}/refresh' \
  -H 'Authorization: Bearer <your_access_token>'
Retrying failed tickets
If ticket creation failed, you can retry:
curl -X POST 'https://your-fides-instance.com/api/v1/plus/privacy-request/{privacy_request_id}/jira-tickets/{instance_id}/retry' \
  -H 'Authorization: Bearer <your_access_token>'
The retry is allowed when the privacy request is in one of these statuses: approved, in_processing, paused, pending_external, or requires_input.
Linking a replacement ticket
If a Jira ticket was deleted or you need to associate a different ticket with the privacy request, you can link an existing Jira ticket:
curl -X POST 'https://your-fides-instance.com/api/v1/plus/privacy-request/{privacy_request_id}/jira-tickets/link' \
  -H 'Authorization: Bearer <your_access_token>' \
  -H 'Content-Type: application/json' \
  -d '{"ticket_key": "PRIV-456"}'
Template variables
The following variables are available for use in the summary and description templates. Insert them using the __VARIABLE_NAME__ format (e.g., __REQUEST_ID__).
| Variable | Description | Example value |
|---|---|---|
__REQUEST_ID__ | Fides privacy request ID | pri_abc123-def456 |
__REQUEST_TYPE__ | The type of privacy request: access, erasure, consent, or update | erasure |
__SUBMISSION_DATE__ | When the data subject submitted the request | 2025-01-15 10:30 UTC |
__APPROVAL_DATE__ | When the request was approved | 2025-01-16 14:00 UTC |
__DUE_DATE__ | Policy-derived due date for the request | 2025-02-14 14:00 UTC |
__POLICY_NAME__ | Name of the Fides policy governing this request | Default Erasure Policy |
__EMAIL__ | Data subject email address | user@example.com |
__PHONE__ | Data subject phone number | +1-555-0100 |
__FIDES_REQUEST_URL__ | Deep link to the request in the Fides admin UI | https://fides.example.com/privacy-requests/pri_abc123-def456 |
Templates also support a limited set of Jinja2 filters: upper, lower, title, trim, replace, default, and truncate.
Configuration
| Environment variable | Default | Description |
|---|---|---|
FIDES__EXECUTION__JIRA_POLLING_INTERVAL_MINUTES | 10 | Minutes between polling Jira for ticket status updates |
API reference
All Jira ticketing endpoints require authentication and are available under the /api/v1/plus prefix.
OAuth
| Method | Path | Description |
|---|---|---|
POST | /oauth/jira/initiate | Initiate OAuth 2.0 authorization flow. Returns an authorization_url. |
GET | /oauth/jira/callback | Handles the OAuth callback from Atlassian (not called directly). |
Configuration
| Method | Path | Description |
|---|---|---|
GET | /connection/{connection_key}/jira/projects | List Jira projects. |
GET | /connection/{connection_key}/jira/projects/{project_key}/issuetypes | List issue types for a project. |
GET | /connection/{connection_key}/jira/statuses | List Jira status categories. |
GET | /connection/{connection_key}/jira/template-variables | List available template variables. |
POST | /connection/{connection_key}/jira/preview | Preview a rendered ticket. |
POST | /connection/{connection_key}/jira/test-ticket | Create a test ticket in Jira. |
Ticket management
| Method | Path | Description |
|---|---|---|
GET | /privacy-request/{id}/jira-tickets | List all Jira tickets linked to a privacy request. |
POST | /privacy-request/{id}/jira-tickets/link | Link an existing Jira ticket to a privacy request. |
POST | /privacy-request/{id}/jira-tickets/{instance_id}/retry | Retry creating a ticket for a failed instance. |
POST | /privacy-request/{id}/jira-tickets/{instance_id}/refresh | Refresh a ticket's status from Jira on demand. |
Setting up the integration (API)
Step 1: Create the connection
Create a connection configuration with connection_type set to jira_ticket:
curl -X PATCH 'https://your-fides-instance.com/api/v1/connection' \
  -H 'Authorization: Bearer <your_access_token>' \
  -H 'Content-Type: application/json' \
  -d '[{
    "name": "Jira Ticketing",
    "key": "jira_ticketing",
    "connection_type": "jira_ticket",
    "access": "write"
  }]'
Step 2: Authenticate with Jira
Option A: OAuth 2.0 (recommended)
Initiate the OAuth flow by calling the initiation endpoint:
curl -X POST 'https://your-fides-instance.com/api/v1/plus/oauth/jira/initiate' \
  -H 'Authorization: Bearer <your_access_token>' \
  -H 'Content-Type: application/json' \
  -d '{"connection_key": "jira_ticketing"}'
This returns an authorization_url. Open this URL in a browser to complete the Atlassian authorization flow. After granting access, Atlassian redirects to the Fides callback endpoint, which exchanges the authorization code for access and refresh tokens, and stores them in the connection's secrets.
Option B: API key
Set the connection secrets directly with your Jira domain, username, and API token:
curl -X PUT 'https://your-fides-instance.com/api/v1/connection/jira_ticketing/secret' \
  -H 'Authorization: Bearer <your_access_token>' \
  -H 'Content-Type: application/json' \
  -d '{
    "domain": "your-domain.atlassian.net",
    "username": "your-email@example.com",
    "api_key": "your-jira-api-token"
  }'
Step 3: Configure ticket templates
Configure the ticket template by updating the connection secrets with your project, issue type, and templates:
curl -X PUT 'https://your-fides-instance.com/api/v1/connection/jira_ticketing/secret' \
  -H 'Authorization: Bearer <your_access_token>' \
  -H 'Content-Type: application/json' \
  -d '{
    "project_key": "PRIV",
    "issue_type": "Task",
    "summary_template": "DSR: __REQUEST_TYPE__ for __EMAIL__",
    "description_template": "Privacy request __REQUEST_ID__ submitted on __SUBMISSION_DATE__.",
    "due_date_config": {
      "type": "fixed_days",
      "days": 30
    }
  }'
To omit the due date, set due_date_config to null or exclude it from the payload.
Discovering projects and issue types
You can query available Jira projects and issue types to determine the correct values for your configuration:
# List available projects
curl -X GET 'https://your-fides-instance.com/api/v1/plus/connection/jira_ticketing/jira/projects' \
  -H 'Authorization: Bearer <your_access_token>'

# List issue types for a project
curl -X GET 'https://your-fides-instance.com/api/v1/plus/connection/jira_ticketing/jira/projects/PRIV/issuetypes' \
  -H 'Authorization: Bearer <your_access_token>'
Previewing a ticket
Before creating real tickets, you can preview how a ticket will render with sample or real data:
curl -X POST 'https://your-fides-instance.com/api/v1/plus/connection/jira_ticketing/jira/preview' \
  -H 'Authorization: Bearer <your_access_token>' \
  -H 'Content-Type: application/json' \
  -d '{
    "summary_template": "DSR: __REQUEST_TYPE__ for __EMAIL__",
    "description_template": "Request __REQUEST_ID__ needs action."
  }'
To preview with data from a real privacy request, include the privacy_request_id field. Otherwise, sample values are used.
Step 4: Test the integration
Create a test ticket to verify the full pipeline:
curl -X POST 'https://your-fides-instance.com/api/v1/plus/connection/jira_ticketing/jira/test-ticket' \
  -H 'Authorization: Bearer <your_access_token>'
This creates a real Jira ticket using sample data and returns the ticket details including the ticket_key and ticket_url.